Not sure what elements to choose? Then, please use our descriptions and images below of the different parts of a patch. They will help you design a beautiful, custom embroidered patch.
Embroidery Options
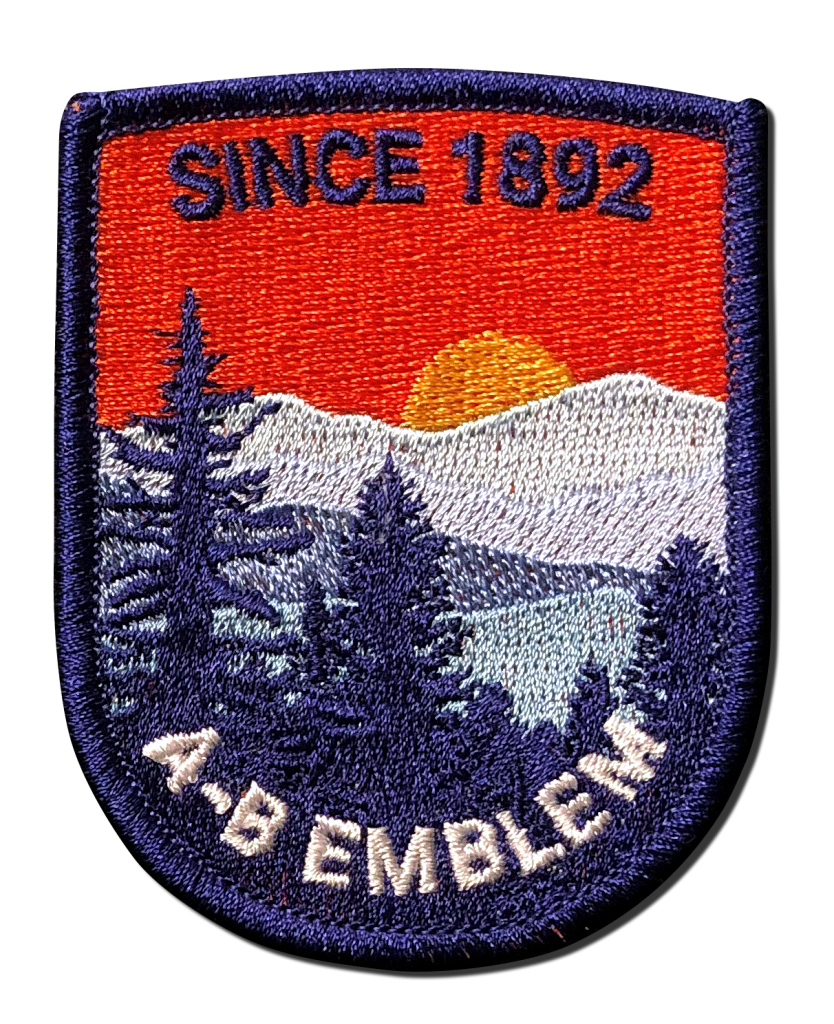
Fully Embroidered
The face is covered in stitches. So, the twill backing is not visible or exposed. A fill stitch is used to cover in-between areas. This option costs more because it has more stitches. It feels thicker and gives the patch a high-quality appearance. The embroidery thread creates a background color, so there are more color options.
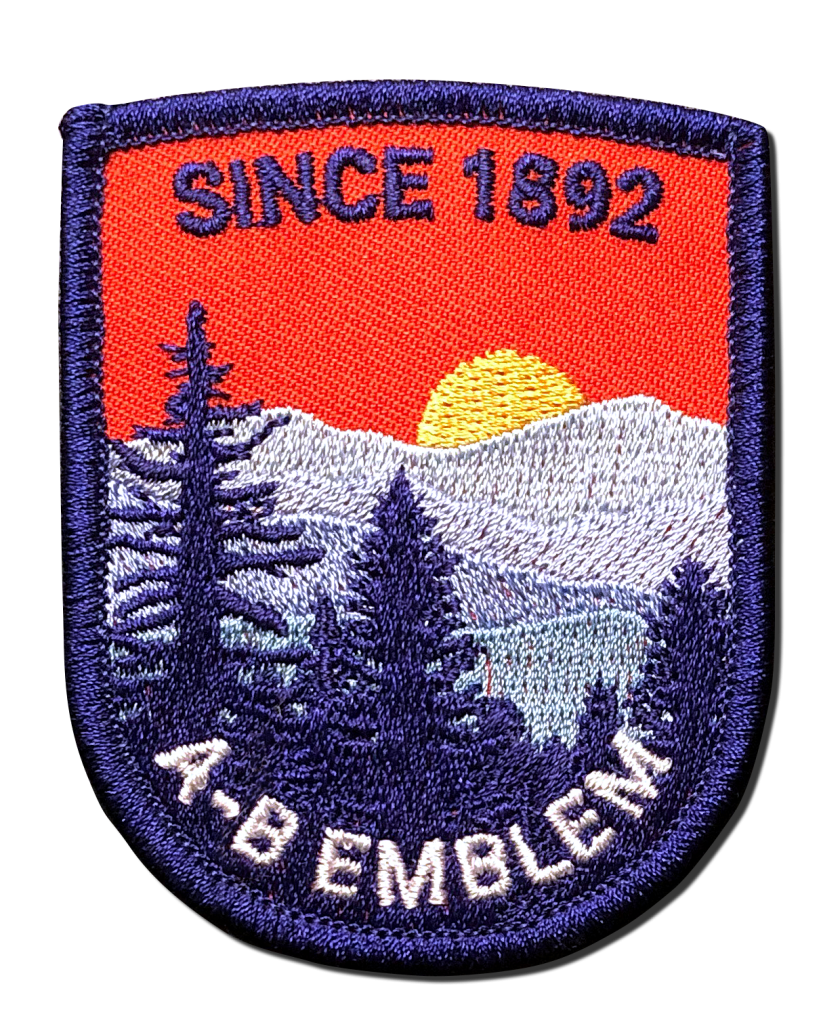
Non-Fully Embroidered
The color and texture of the background come from a pre-dyed color twill backing which is exposed (no stitching) in areas. This option requires less thread than Fully Embroidered, giving the design a cleaner, more defined look while also resulting in the patch having a thinner and more pliable feel.
Border Options
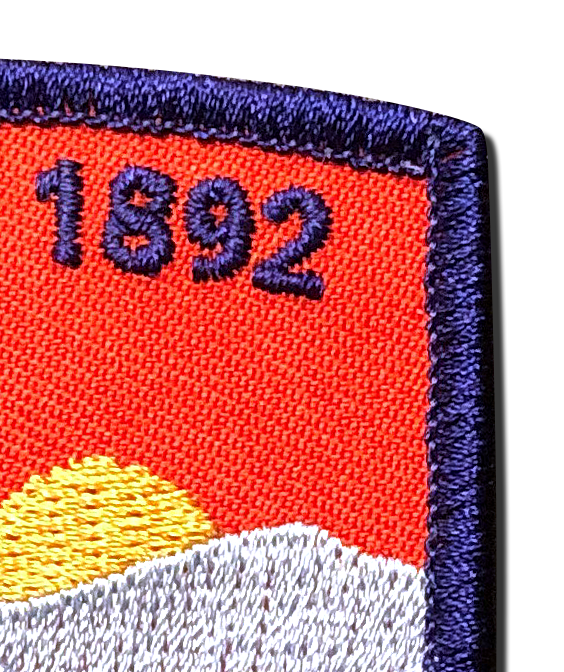
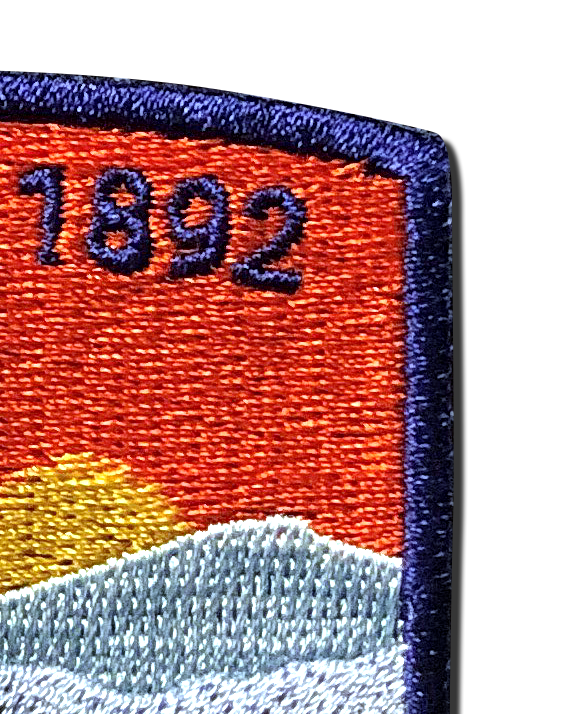
Overlock Edge (Merrow)
It is the classic look for simple patch shapes like circles, squares, rectangles, etc. The border is 1/8 inch thick and applied after the patch has been die-cut. For best results, the embroidered details of the design should be at least 1/16 of an inch away from the Merrow border.
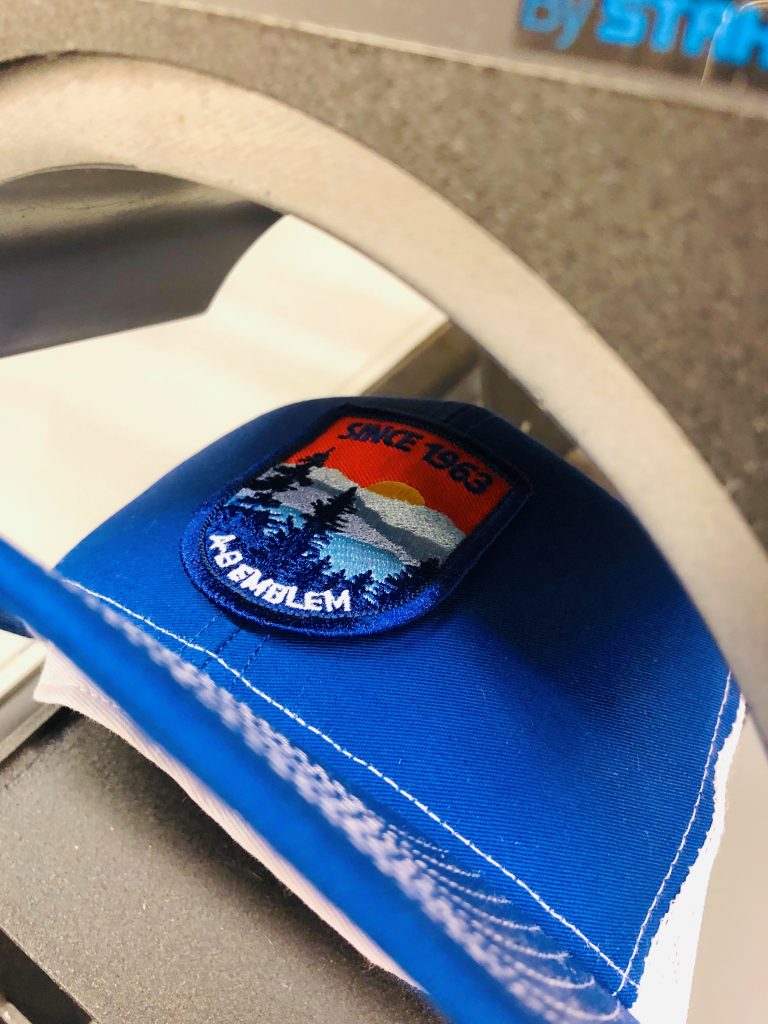
Hot Needle Cut (Contour)
This border incorporates the edge stitching into the overall design, rather than being added later, allowing for non-uniform and complex patch shapes. Due to the low profile edges, patches utilizing a Hot Needle Cut border with Iron-On Backing, obtain an edge-to-edge seal, making them look more integrated with garments and other finished products.
A Guide to Attachments
The Backing Options

Sew-On
It is a plastic backing that provides more structure, helping the patch to lay flat while remaining relatively thin. This backing is meant to be used when a patch needs to be sewn onto a garment or fabric, hence the name.
Iron-On
Iron-On utilizes a heat seal material that provides adhesion to natural fiber fabrics when properly pressed using a heat source (most commonly a household iron). The backing also provides a structure that helps the patch to lay flat. A word of caution: synthetic fabrics can melt in the heat seal process and are not advised.
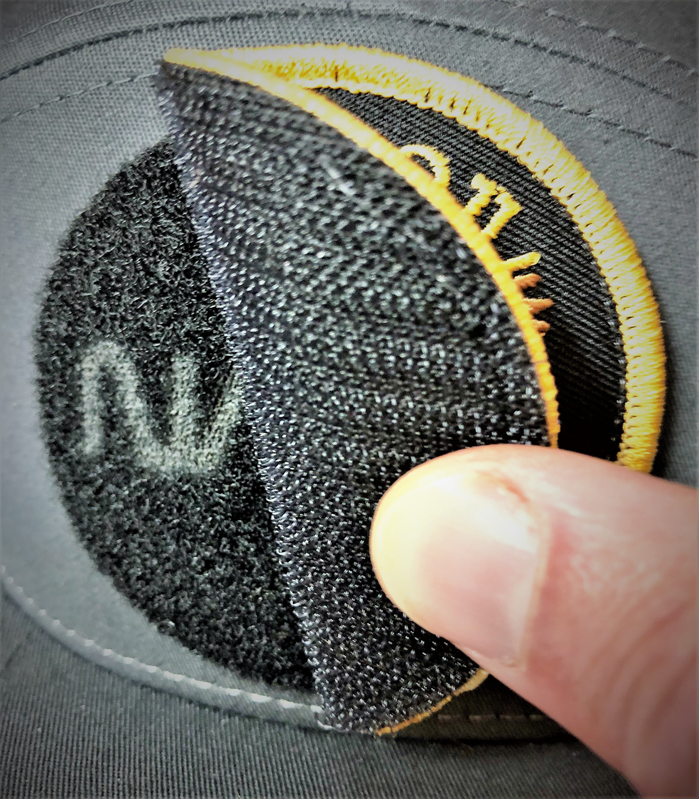
Velcro
A two-part system that gives the patch the ability to be removed or changed out for another. A “hook” backing is attached to the patch using a Merrow border while a compatible “loop” face is attached to a garment, hat, bag, or other items. This style of backing is prominent in military and tactical apparel. Additional uses are sports & school uniforms, hats, backpacks, luggage, and bags.

Sticky Back
Sticky, pressure-sensitive, peel & stick, or whatever you call it, this backing turns the patch into an embroidered sticker. The patch can be applied to hard surfaces or clothing. The adhesive may leave a difficult to remove residue behind, so caution is advised. Pro tip: to reduce residue put the sticky back patch on a scrap piece of twill and pull away a couple of times before wearing on clothing. Remove promptly after the event is over.
Interested in learning more? Please visit our Design Tips from A-B Emblem and Designing a Great Patch pages in order to become an expert.
And, don’t forget to visit our Custom Patch Photo Gallery.